
Run polished events, grow your community, and understand your customers — all from one platform.
Get Your Venue Running — 4 Steps
1. Create an Organization
Your venue wants an account of its own — an organization — so staff can act as the venue without going through anyone's personal profile, and so it can hold a premium plan. Register a new account, and at the "What kind of account?" step of onboarding pick Shop (or Festival, if that fits you better) instead of Player. Already have a group? You can give it a login later without losing anything.
2. Set Your Location
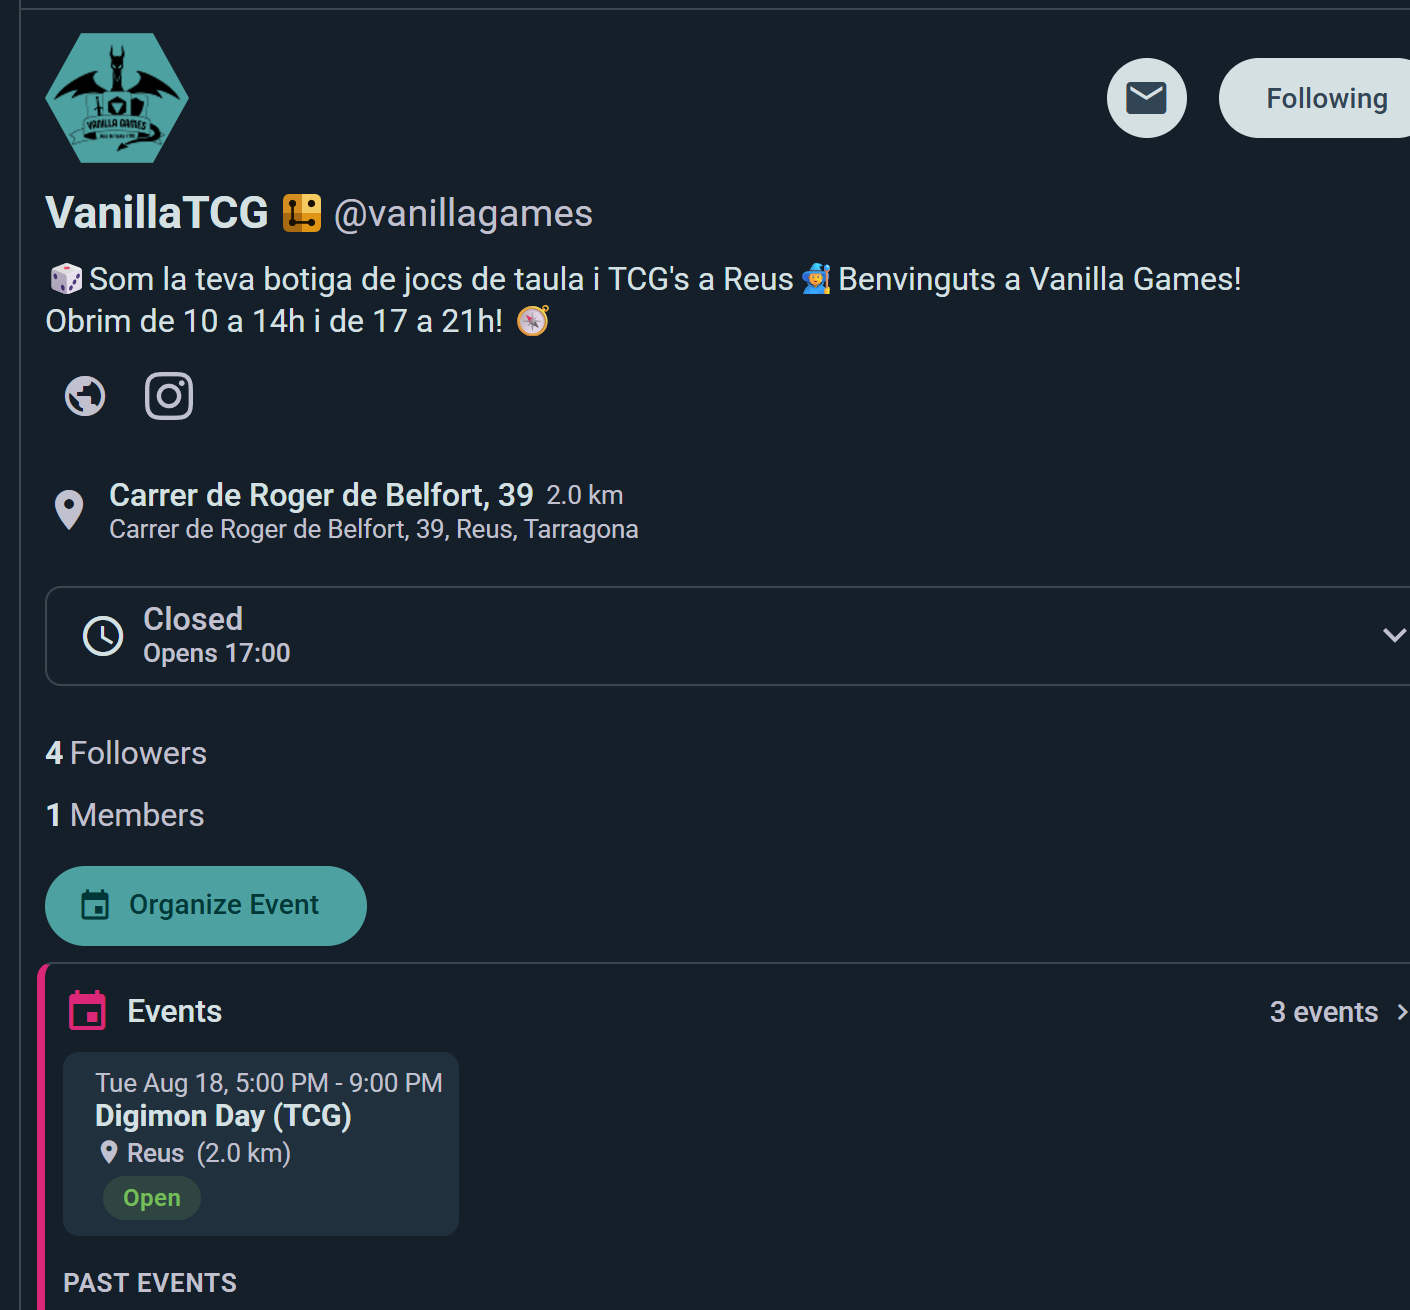
Set your venue's name, description and avatar in Organization Setup, then add your address as a Location under Settings → Locations — that's what puts you on the map so players can find you. While you're there, fill in your opening hours: they show on your profile, warn you if you schedule an event outside them, and let players filter communities by Open at — a date and a time, so someone planning next Saturday evening can find you, not just someone looking right now.
3. Create Your First Event
From your organization page, create an Event. Set the title, date, time, and your venue as the location. An event can be standalone (just attendance), or it can hold scheduled games (sign-up tables for specific titles) and, on the Club tier, sub-events (separate tracks under one roof).
4. Share It
Publish the event and share the link or QR code — post it on your website, pin it at the counter, or send it to your regulars. Members can export it to their personal calendars too.
That's your venue on Ludoya. Everything below adds operational depth as you need it.
Once Your Venue Is Running
Named Spots
Define named spots for your location — individual tables, rooms, or play areas. When you run an event, sub-events and scheduled games each claim a spot so attendees always know where to go and two activities never fight for the same table. Named spots are free for all organization accounts.
Interactive Floor Plans (Business Tier)
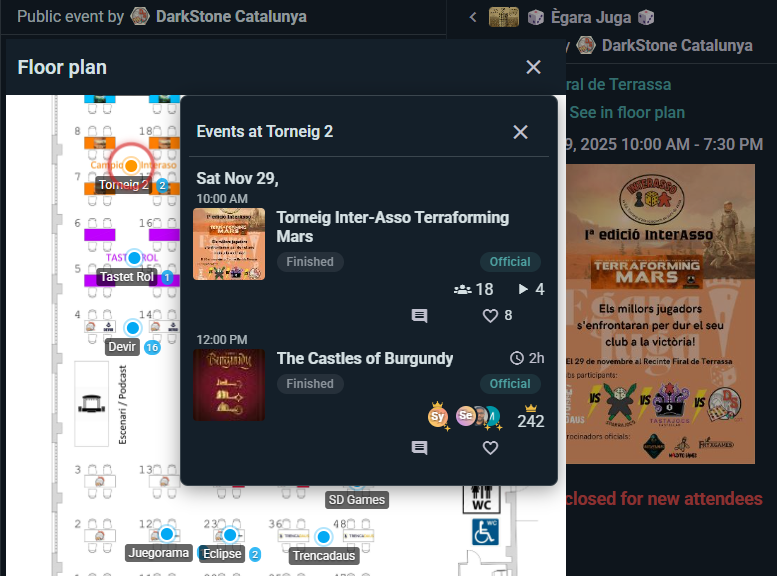
Upload a floor plan image for your location and drag each spot onto the map — attendees see a pannable, zoomable layout of your space. Without a floor plan, spots work as plain labels ("Table 3", "Back Room"). The visual map is worth it at larger venues where navigation actually matters.
Structured Events
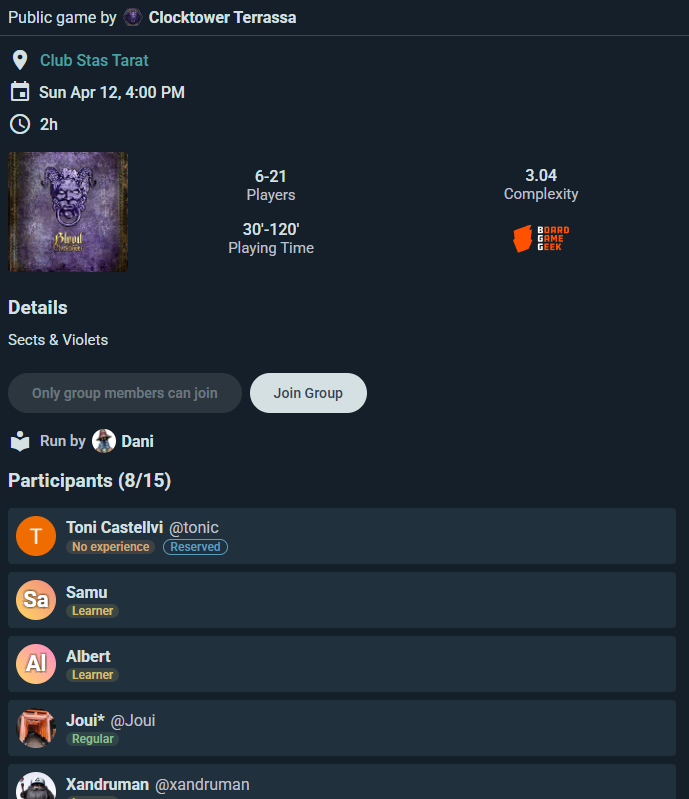
Scheduled games — add a lineup to your event with time slots, seat counts and waitlists. A seat can be flagged as a Demonstrator (someone who'll teach the game) or a Game Master. Each person notes their own experience level when they sign up, so you can see at a glance whether a table is full of newcomers or veterans.
Games at the Event — a shared list of what's in the room. Anyone attending can add a title from the catalog, and as an organizer you can bulk-add straight from your venue's collection instead of one at a time. Mark each copy free to play or owner present, and flag the ones you provide as official. Attendees react to the lineup from "Need to play" down to "Pass", so you can see demand before deciding which tables to schedule.
Recurring events (Player tier) — set up board game nights that auto-repeat every week or every few weeks, on the weekdays you pick. Members see the full series and RSVP to individual sessions.
Sub-events (Club tier) — run multi-track events with separate schedules, capacities, and sign-up lists under one parent event.
Play booths — offer tables across time slots and let Ludoya form games as player availability overlaps. Ideal for open-table nights and demo areas: walk-ins mark when they're free, and you start games when enough players are pooled — automatically or with one tap.
Game Library
Your organization's collection is separate from personal collections. Catalog every game on your shelves — customers browsing your Ludoya page can see what's available before they visit. Note where each copy lives with Inventory Location ("Shelf B", "Back room") so staff can actually find it. If you sell games, list them on the Marketplace to reach Ludoya's audience.
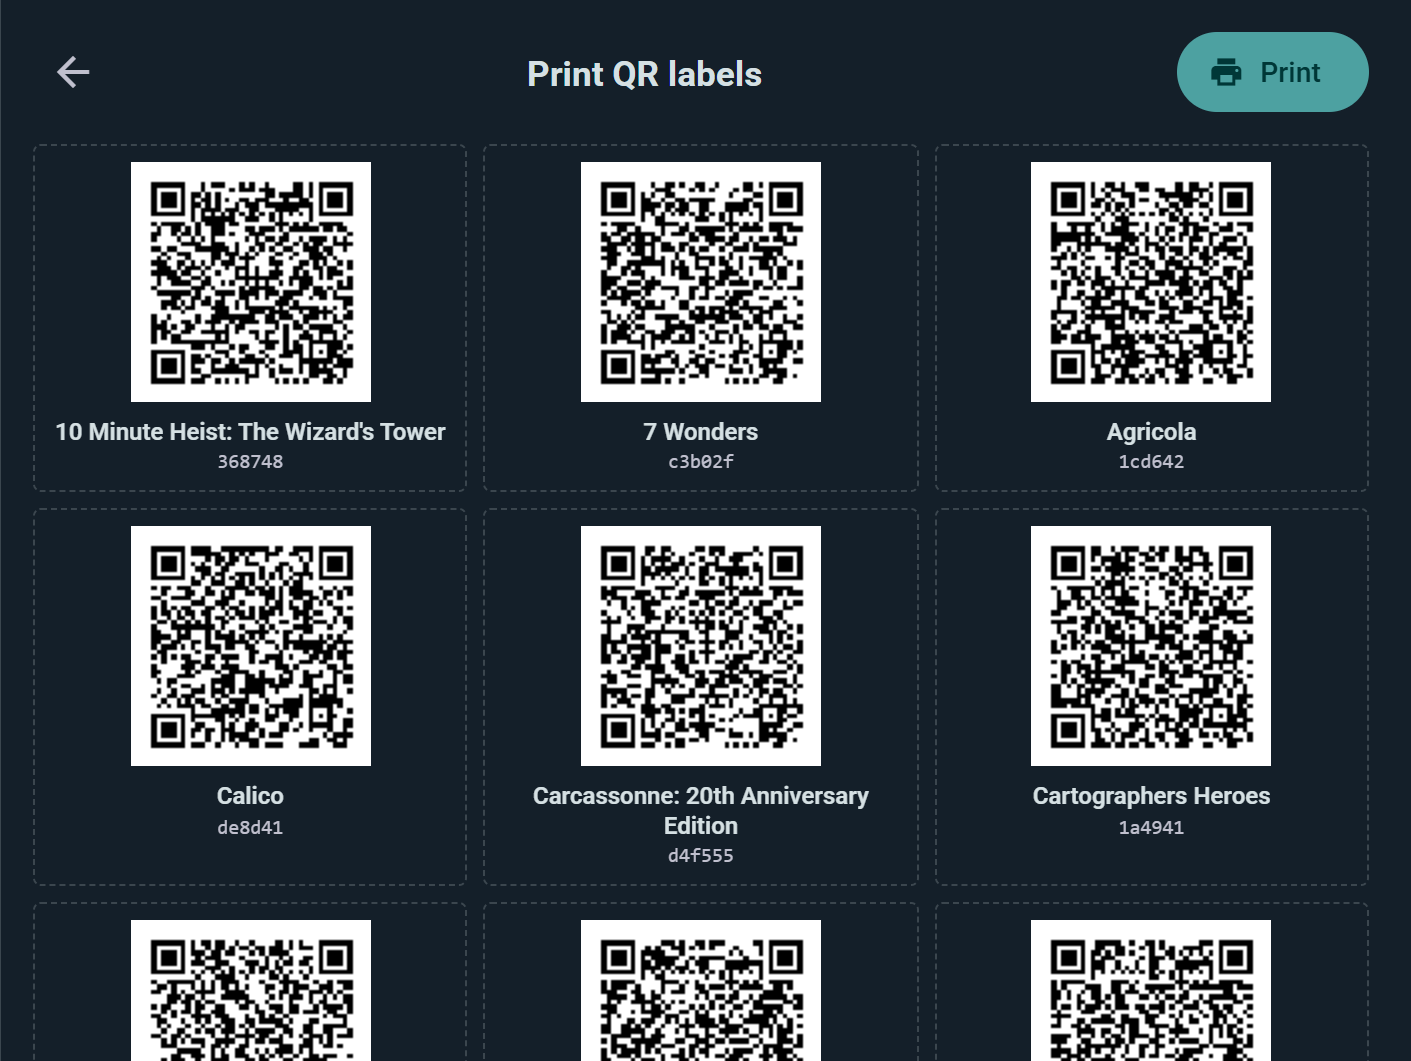
QR labels on every box (Business tier) — print a QR label for every copy from your collection's ⋮ menu and stick one on each game. Customers at your events scan a box to take it to their table and scan again to return it — every loan tracked, no staff involved. Your staff scan labels in bulk to set inventory locations or register a stack of games to tonight's event.
Promote Your Venue
Telegram integration (Club tier) — auto-post event announcements to your venue's Telegram channel when you publish.
Embeddable widgets — embed your event calendar, game collection, or play activity on your website. Pulls live data from Ludoya.
QR codes — print one at the counter so walk-ins can join your group instantly.
Image exports — shareable visuals for social media: event lineups, top games played, monthly stats.
Tournament Nights (Club Tier)
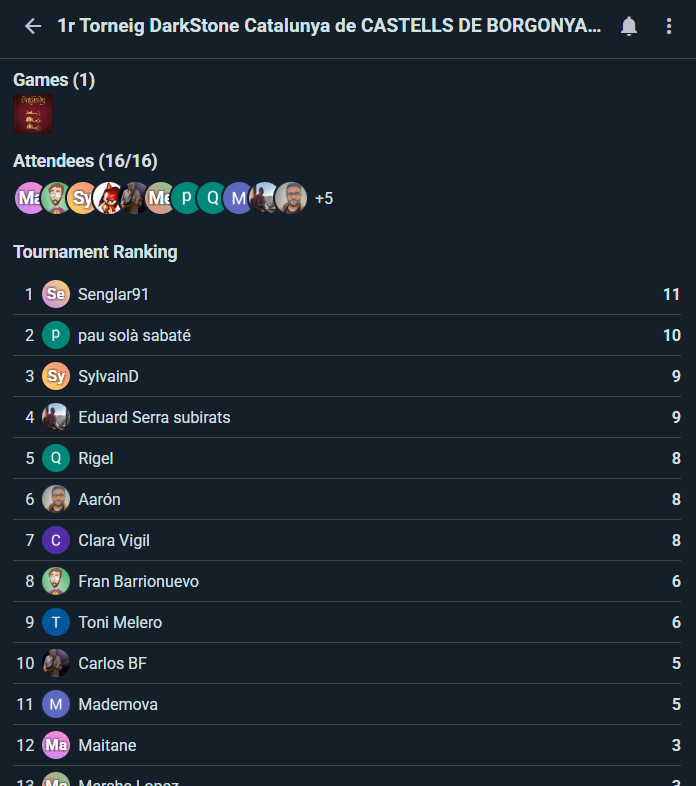
From your group page choose Organize Tournament — run it as Swiss, mixer, or single/double elimination. Ludoya generates the pairings and bracket and keeps a live leaderboard you can put up on a screen at your venue, then share the final standings in your feed.
Prize Raffles (Club Tier)
Run prize raffles at your events — add your prizes and draw winners with a live animated reveal everyone can watch. Perfect for store giveaways and convention prize tables.
QR Entry Verification (Business Tier)
Attendees show a QR code from the event page. Scan it at the door and Ludoya confirms they're on the list and checks them in, so attendance is recorded as people arrive. Enable Verify attendance with QR code on the event first, and make sure whoever works the door has the Ludoya mobile app — scanning needs the camera, which the web app can't reach. Mark anyone who never turned up with Mark as no-show afterwards.
Custom Attendance Forms (Business Tier)
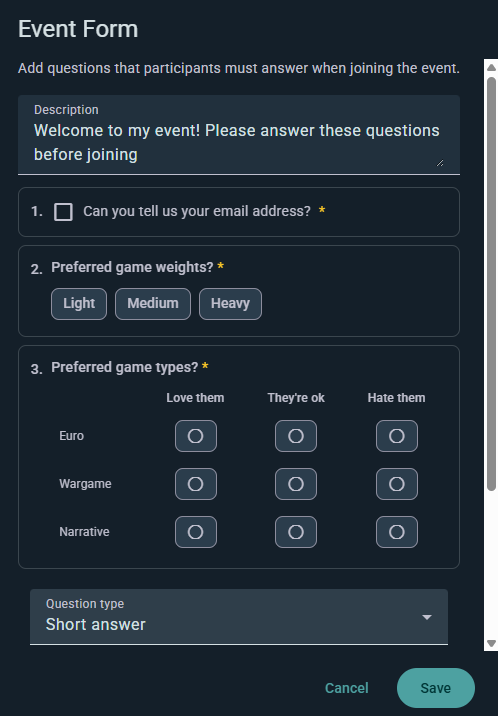
Add questions to your event that attendees answer when they RSVP — dietary needs, experience level, marketing opt-ins, game preferences. Responses are visible in the event management panel and exportable as CSV.
Attendee Data Export (Business Tier)
Download RSVP lists, attendance marks, and form responses as CSV for post-event analysis, email follow-ups, or reporting to venue management.
Event Day Checklists
Setup (once): Create your Organization. Define spots for your location. Optionally attach a floor plan image (Business). Catalog your game collection. Connect Telegram. Embed the event widget on your website.
Before each event: Create the event, assign spots to sub-events and scheduled games, add form questions, publish. Telegram auto-announces. Share the link and QR code.
During the event: Scan QR codes at the door (Business). Organizers start live sessions at each table. Update tournament scores in real time. The AI Game Assistant helps players with rules.
After the event: Export attendance data. Review play summaries and stats. Post highlights to your feed. Plan the next event.